This site is entirely free and intended for stuents of animation with a basic understanding of
traditional animation principles and wanting to explore how to use Flash (or Adobe Animate) as a digital animation tool.
If you would like some feedback on your completed tests, feel free to send me your files, I'll gladly make comments and suggestions on how to improve your work.
Email finished files to: ron.doucet@gmail.com
The new full course:
https://drive.google.com/drive/folders/1Jttd5vc2U5JLMI77Sx7pg7_z_y4kstgK?usp=sharing
Introduction:
In the 1930's Walt Disney helped to set up drawing classes for
his animators. The objective of these classes was to teach the animators
a new way to animate objects to make them more life like. The students
studied the movements of the human figure and various animals. They would
play clips from live action movies over and over just to study the
different aspects of the actions.
Through time a set of procedures and principles were used to help
teach these newly discovered methods to other animators.
These principles are still used today for every type of animation.
They are:
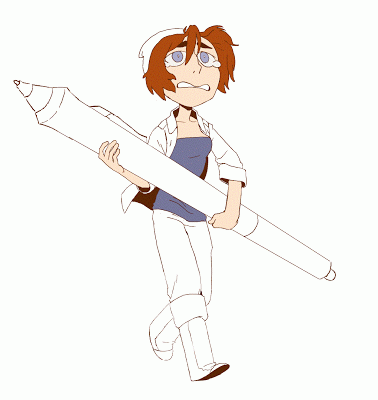
Introduction to Animation Basics in Flash by Harry Partridge:
In these tutorials, master animator Alex Butera casually goes through basic traditional animation techniques for Flash. There's a lot to learn in Flash, but these will hopefully make the program seem less daunting. Thankfully, Flash itself doesn't have much crazy technical stuff to it, but here's some basics:
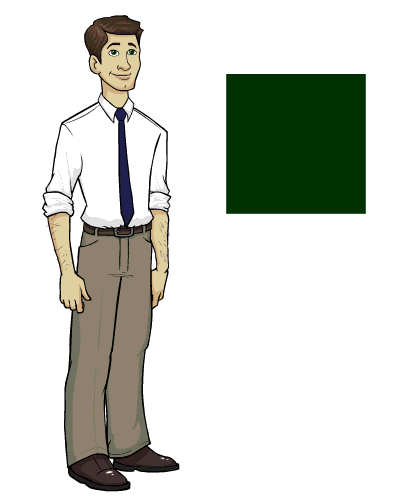
There are two types of animation techniques in Flash.
There's the Traditional Animation method and the Symbol Animation method. The traditional method requires you to hand-draw the poses and inbetweens, frame-by-frame, perferably with a Pen stylus & tablet or tablet monitor system. The Symbols method requires you to draw the shapes, pieces, anatomy of your characters and objects into grouped items, then you puppet them around, similar to stop-motion.
Traditional Symbols
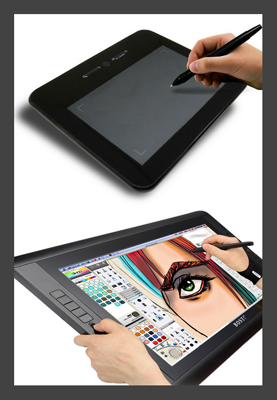
Whether you're animating traditionally (hand-drawn) or only manipulating symbols, using a tablet as your tool will make you faster and more efficient.
If you've only been using a mouse to animate up until now, then obviously this is where you need an Intuos/Bamboo tablet, or (if you're extra fancy) a monitor tablet from Cintiq / Yiynova / Monoprice.
If you're brand new to using a stylus pen, don't worry, all digital artists and animators eventually go from traditional pencil & paper to this technological device, it might take a few days to get fast and proficient with it. All animated television and film productions require you to be familiar with one. After a few hours of sketching and doodling on a tablet, you'll begin to work with the same ease and speed as regular pencil & paper.
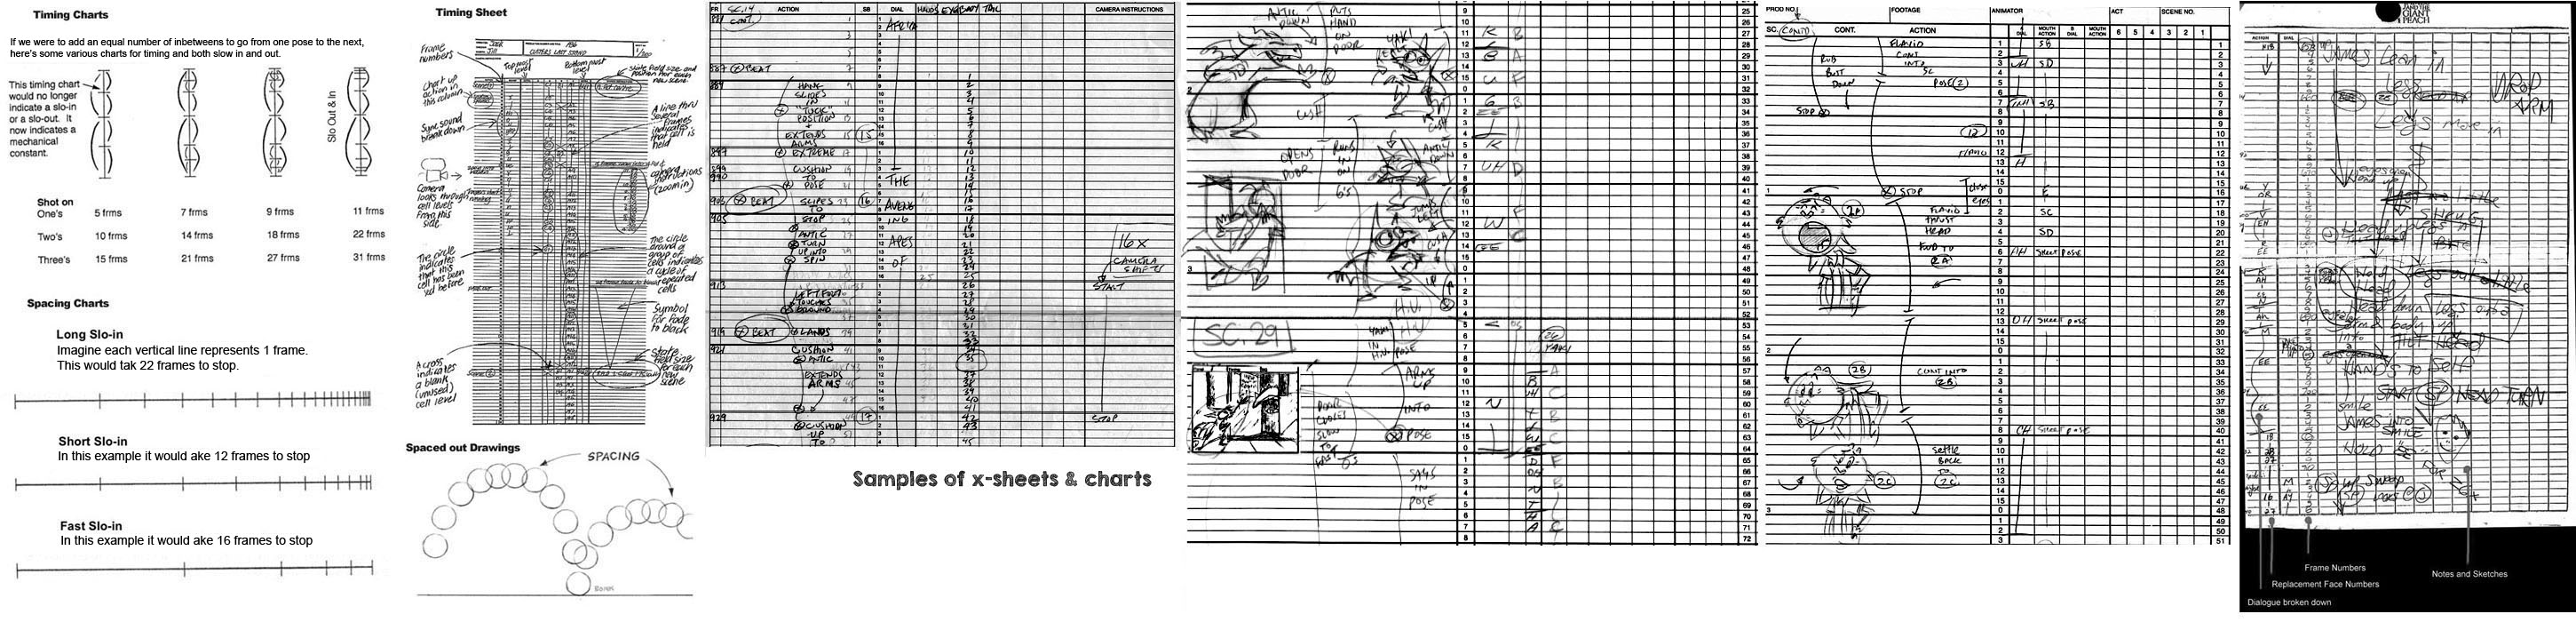
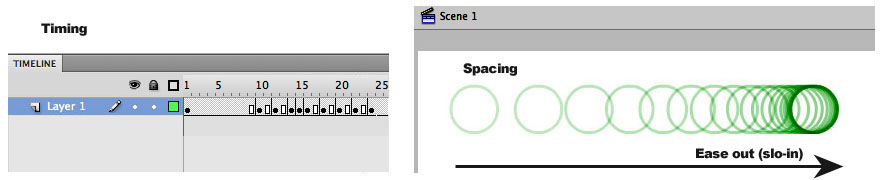
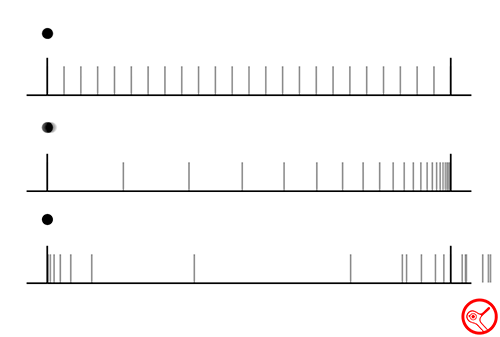
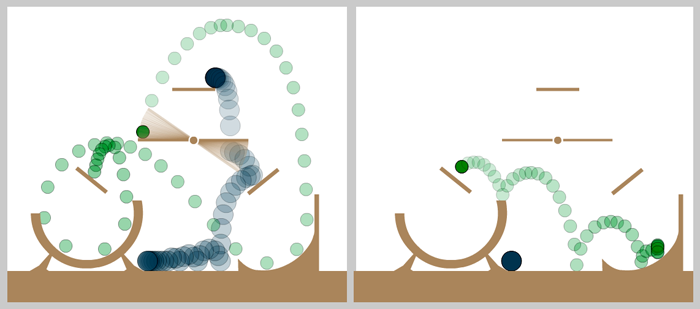
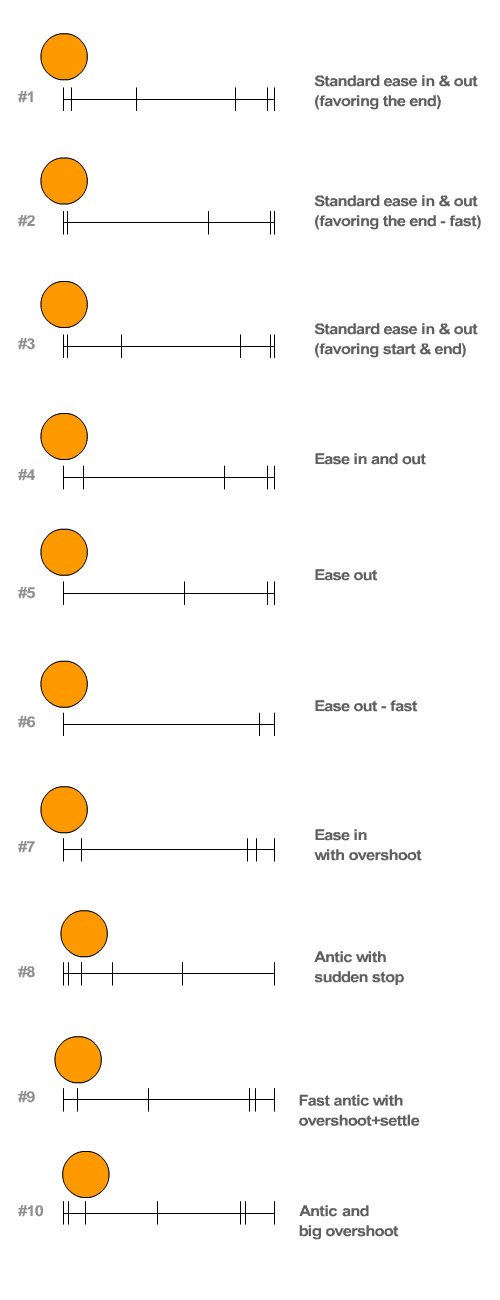
Spacing refers to the frame by frame displacement of the moving elements. If the element is accelerating, the spacing increases from frame to frame. If it's decelerating, the spacing decreases. Everything that is moving is either accelerating or decelerating. The farther apart the spacing is; the faster the action, the closer together; the slower the action.
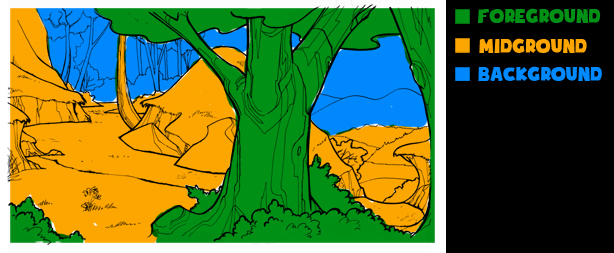
[ Animation Physics Lessons ]
Paths of Action and Arcs
These tutorials extend the basic concept of motion to paths of action, such as parabolic and circular arcs.
Slow-in / Slow-out
As an action starts, you may have more drawings near the starting pose, one or two in the middle, and more drawings near the next pose. Fewer drawings make the action faster and more drawings make the action slower. Slow-ins and slow-outs soften the action, making it more life-like. For a gag action, we may omit some slow-out or slow-ins for shock appeal or the surprise element. This will give more snap to the animation.
Timing, or the speed of an action, is an important principle because it gives meaning to movement - the speed of an action defines how well the idea behind the action will read to an
audience. It reflects the weight and size of an object, and can even carry
emotional meaning.
More than any other principle, timing defines the weight of an object. Two objects, identical in size and shape, can appear to be two vastly different weights by manipulating timing alone. The heavier an object is, the greater it's mass, and the more force is required to change its motion. A heavy body is slower to accelerate and decelerate than a light one. It takes a large force to get a cannonball moving, but once moving, it tends to keep moving a the same speed and requires some force to stop it.
When dealing with heavy objects, one must allow plenty of time and force to start stop or change their movements, in order to make their weight look convincing. Light objects have much less resistance to change of movement and so need much less time to start moving. The flick of a finger is enough to make a balloon accelerate quickly away. When moving, it has little momentum and even the friction of the air quickly slows it up.
Timing can also contribute greatly to the feeling of size or scale of an object or character. A giant has much more weight, more mass and more inertia than a normal man; therefore he moves more slowly. Like the cannonball, he takes more time to get started and, once moving, takes more time to stop. Any changes of movement take place more slowly. Conversely, a tiny character has less inertia than normal, so his movements tend to be quicker.
The way an object behaves on the screen, the effect of weight that it gives, depend entirely on the spacing of the poses and not on the poses themselves. No matter how well rendered a cannonball may be, it does not look like a cannonball if it does not behave like one when animated. The same applies to any object or character. The emotional state of a character can also be defined more by its movement than by its appearance, and the varying speed of those movements indicates whether the character is lethargic, excited, nervous or relaxed.
The relationship between timing & spacing: Timing is the amount of time or frames that you give to each movement. Spacing is the space or gap that you leave between each frame or pose.
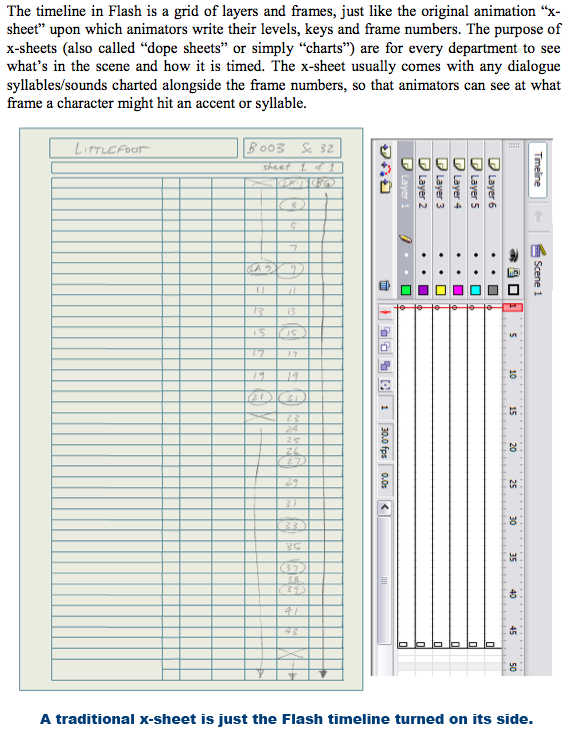
Here's the old school, traditional animation version:
Flash version:
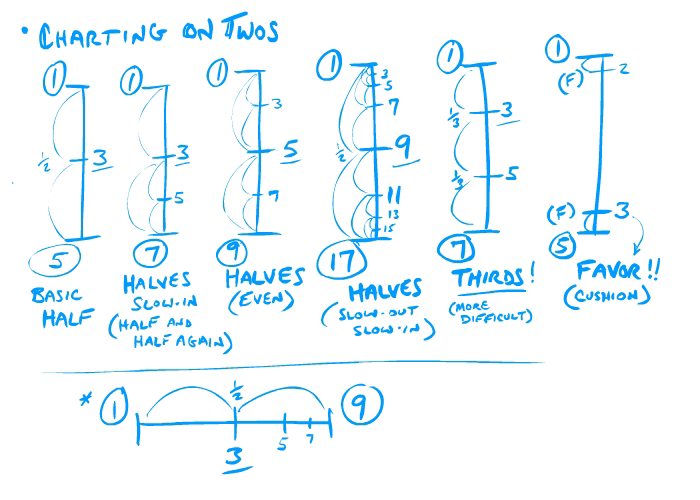
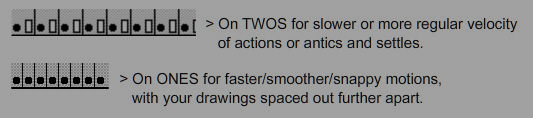
Charts can be made in halves or thirds, or animated on 1s or 2s.
It's all about how to break down and divide up the action within 24 frames per second.
In the first 45 seconds of the clip shown here, you'll notice these timing charts popping off & on around the character. They help indicate to the inbetween/clean-up animator how to space out the drawings between the keys as well as how many inbetween drawings to place between those poses.
The relationship between timing and spacing is the very core of all animation.
See these three samples below, they all have the exact same timing (start and stop at the same time), however the spacing for each one is very different, producing three very different effects.
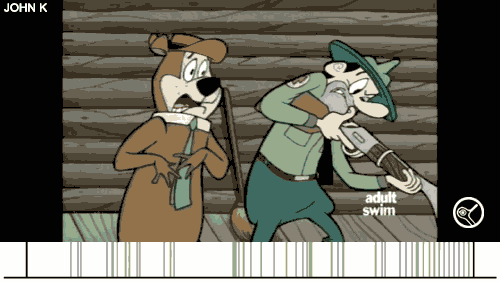
For example, see how John Kricfalusi has a distinctive style in the timing of his animation:
See when he decides to hold the poses, and for how long, when he slows down, and when he speeds up.
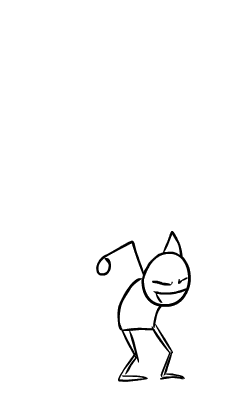
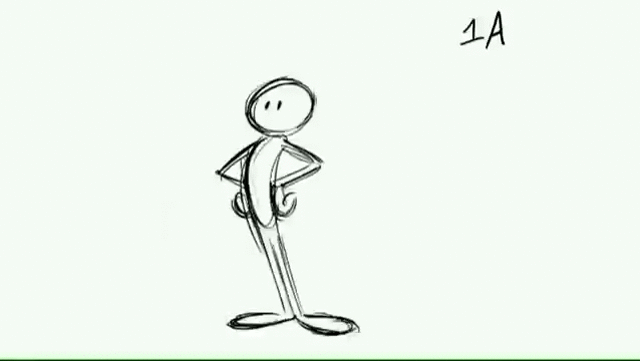
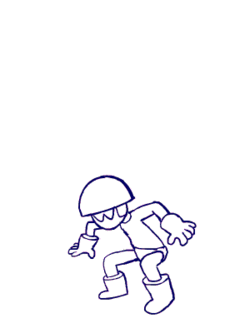
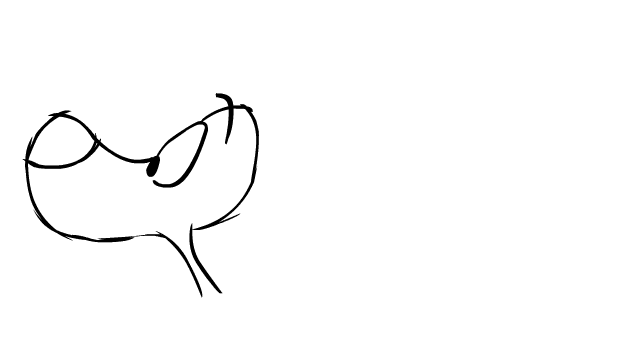
Practice drawing/posing this simple character model:
A character jump is a great way to practice overlapping action; the tendency for parts of the body to move at different rates (an arm will move on different timing from the head and so on).
Look at this sample to observe how all the fundamentals of animation can be shown in a single clip.
Overlapping action is one of the most important principles to practice over and over again, it adds so much weight and life to character movements.
Here's a character jump tutorials and other helpful tips:
Remember - Many character movements can follow this system:
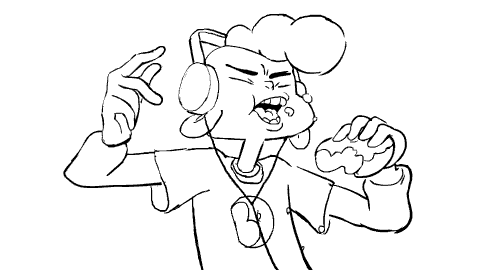
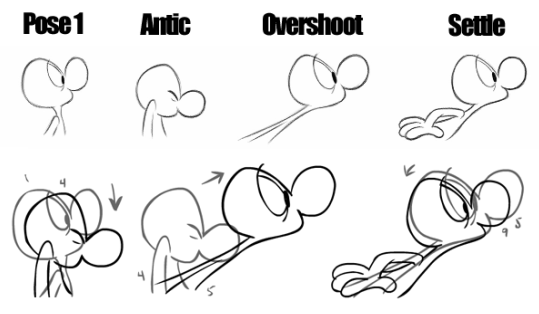
Anticipation - Action - Reaction
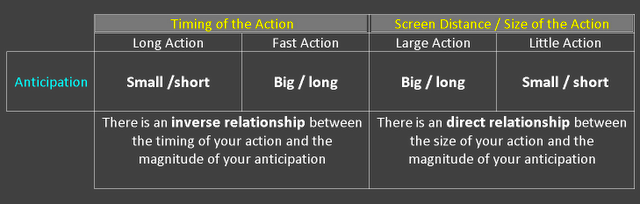
Anticipation
- Preparation.
- Catches audiences eye.
- Directional focus, points out object of the action. Usually moves in the opposite direction to add punch and contrast to the action itself.
- In acting it will indicate character and personality.
- Once anticipation is established, the action itself is usually self evident (especially in fast actions).
- Slower actions have more minimal anticipations.
Action
- PRIMARY ACTION is not caused by another force. It is the motivating force.
- Once an action is started it must be completed.
- In dialogue, strong actions are cued by strong inflections in the spoken phrase.
- Real action is a manifestation of force. All actions have meaning, some stir an emotional response, these become gestures.
Reaction
- FOLLOW-THROUGH ACTION occurs as a result of another action.
- Subject to the effects of gravity, elasticity, buoyancy.
- Clothing is always secondary, either fixed or flowing.
- Drapery is secondary to body action and gravity.
- Appendages (ears, arms, tail, legs,) can be secondary to body actions and gravity, or become primary when motivated by thoughts.
- Overlapping action BEGINS within the action itself.
- Overlap a series of actions to enhance overall fluidity.
- Characters are subject to ALL the mechanics of structure and gravity.
(C) Animation by Dana Terrace
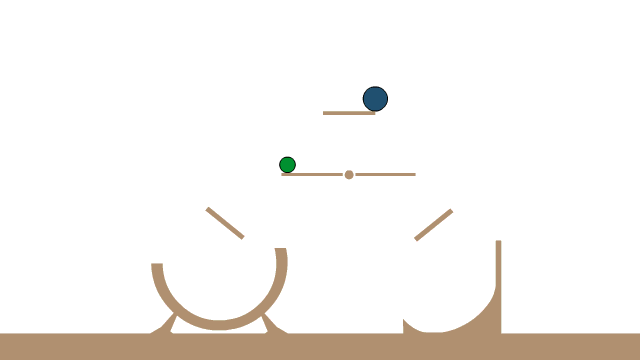
[ Animation Physics Lessons ]
Timing, Spacing, and Gravity
These tutorials cover the basic elements of falling motion, specifically how to create believable timing and spacing.
 This site is entirely free and intended for stuents of animation with a basic understanding of
traditional animation principles and wanting to explore how to use Flash (or Adobe Animate) as a digital animation tool.
If you would like some feedback on your completed tests, feel free to send me your files, I'll gladly make comments and suggestions on how to improve your work.
This site is entirely free and intended for stuents of animation with a basic understanding of
traditional animation principles and wanting to explore how to use Flash (or Adobe Animate) as a digital animation tool.
If you would like some feedback on your completed tests, feel free to send me your files, I'll gladly make comments and suggestions on how to improve your work.


 There are two types of animation techniques in Flash.
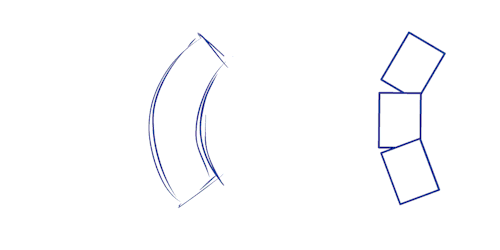

 Slow-in / Slow-out